Powered by CGI Design
Contact us: send use email using the form in this link
http://www.cgidesign.ca/Home/sendMail
Office exchange is a POS system designed for currency exchange offices around the world.
Client registration
Depending on the location and region you are doing business your regulatory office requires you to register your client in the system an keep a copy of client’s valid identification like driver license or passport , in your client files. Moreover, companies should maintain KYC (know your client) so they can identify risks associated to the client, transactions and business they do with your company.
Office Exchange provides you with the tools you’d need to accommodate and facilitate KYC and book keeping.
With Office Exchange, you would be able to register and save detail of information about clients and their related transactions. Save client identification and any related documents as an image to client file so you will be able retrieve when you need them.
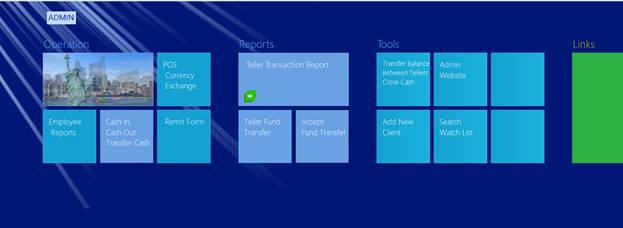
To register your client in the system:
1- Log In to the system, In the control panel window (landing page) click on add new client
2- If you are on POS currency Exchange page window, click on Add “New Client” from top menu
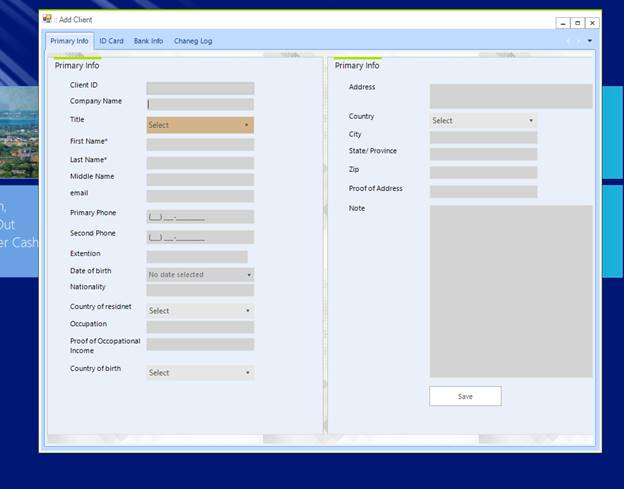
There are 4 tabs on add New client window
Primary : you must add client name and phone number in order to use other tabs
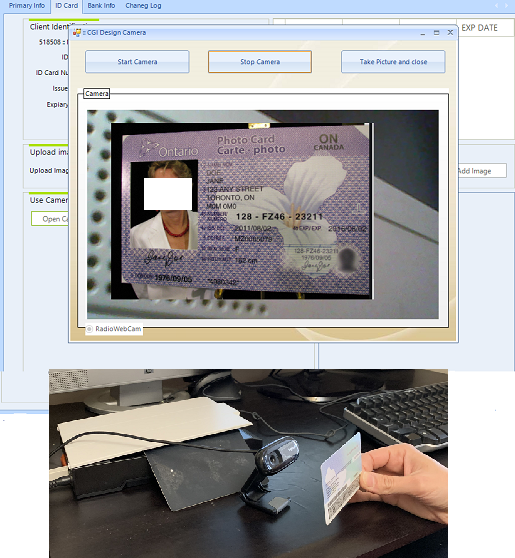
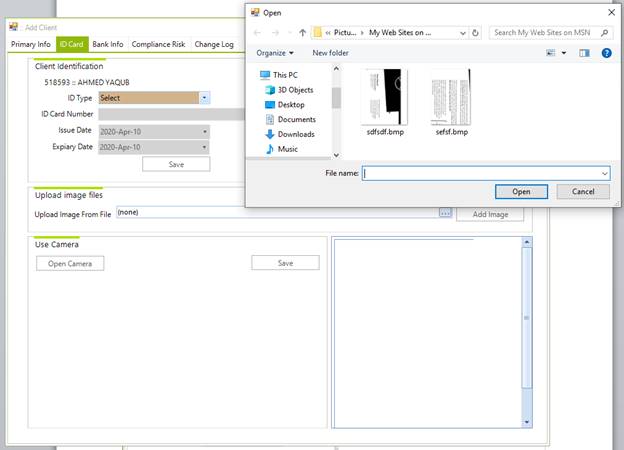
ID card : On this tab, we can add client identification card like driver license. You will be able to add photo id or other documents of client to his/her file. Simply attach a web cam to the computer, take picture of client ID, and save it to his/her file.
Moreover, we can upload image file to client profile if you wish to scan it using scanner,
Office Exchange has integrated passport reader and driver license scanner component and it reads from passport and driver license and automatically adds the info to system also an copy of DL or passport will be saved to the system.
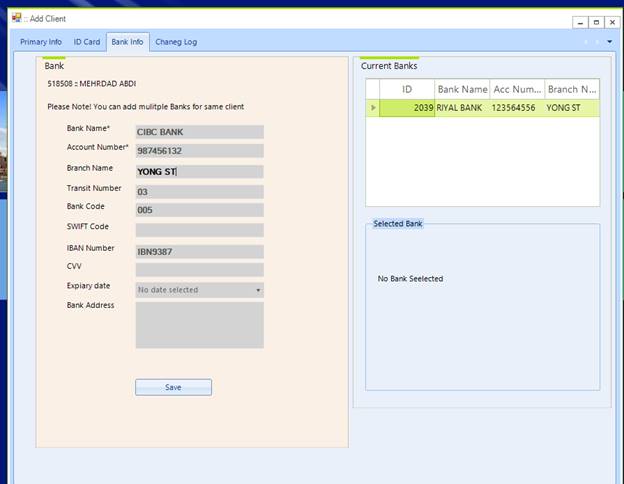
Bank Info: this is to gather client-banking information so you would have it in the system for direct deposit if needed; this feature is for remit transaction form and reports
Change Log: this tab has a report of all key info changes to the client information like name Phone number, address changes …
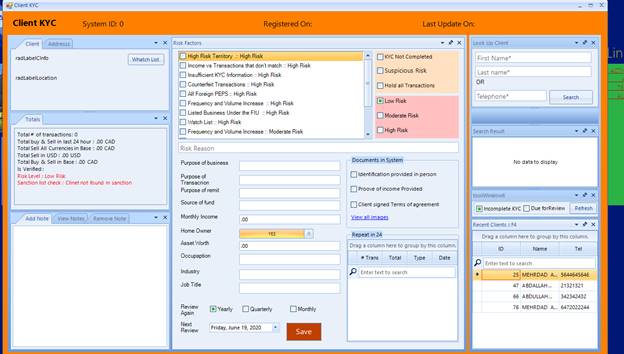
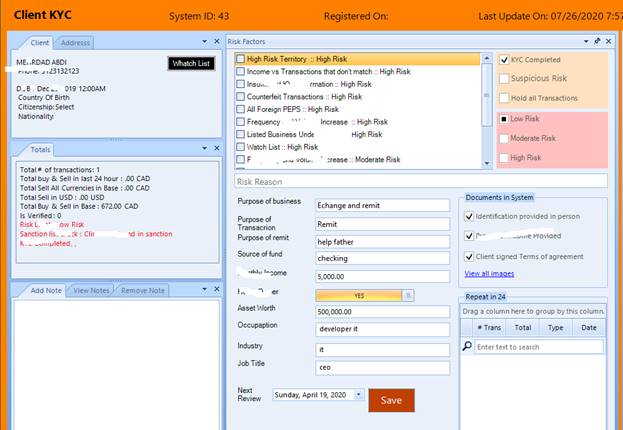
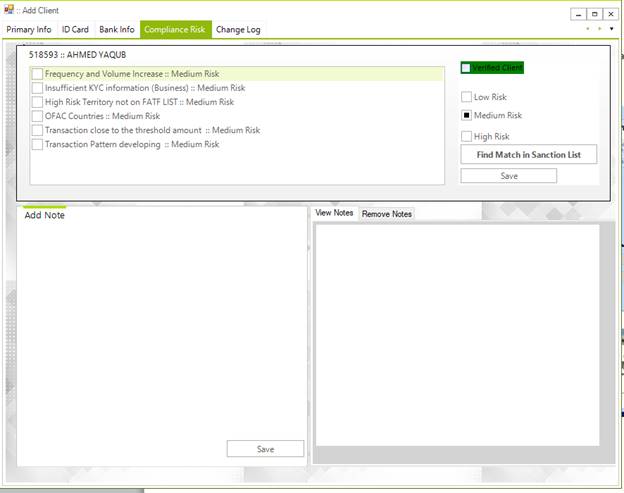
Manage Risk in Compliance KYC Window
You can access KYC window directly from control panel or from update client window.
In Update client window, Compliance KYC Tab, there are 3 categories of Risks
· Low risk, all clients are considered low risk unless you set them to other risk category
· Moderate Risk
· High Risk
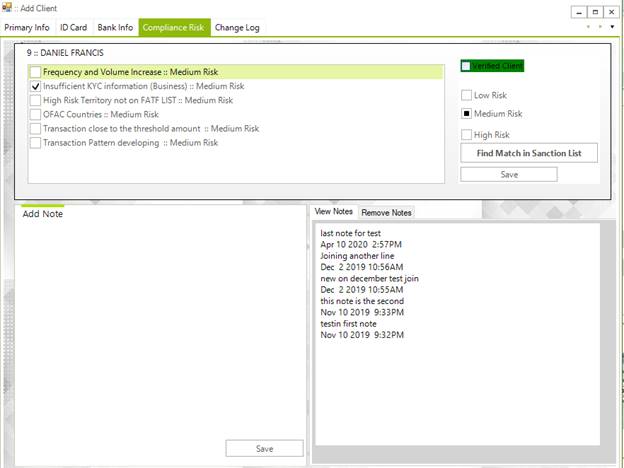
Your compliance officer will do the analysis on each client and set client risk type accordingly. Compliance Officer can add notes and check the KYC Completed so it can help for filtering in the reports, for example a list of High Risk clients and their transactions.
On the same page there is button that help with scanning the client name against watch list (sanction list like OFAC, FITRAC, Un Sanction list)
.
Fuzzy search against Sanction List
We can automate the sanction list update and schedule it run in
back-end.
The automated job can use the sanction list from your region. For
example for USA we will use the SDN consolidated list
and UN designated sanction list; moreover our client can upload their own list
to the system.
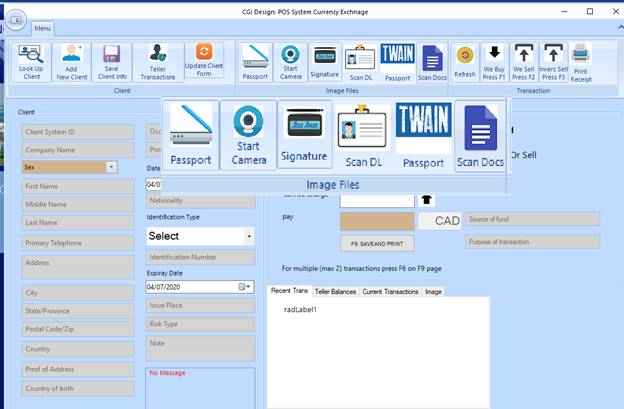
Another way to register client in the system is from POS Currency Exchange window
In this window on the left side we have client registration form and on the right side transaction form
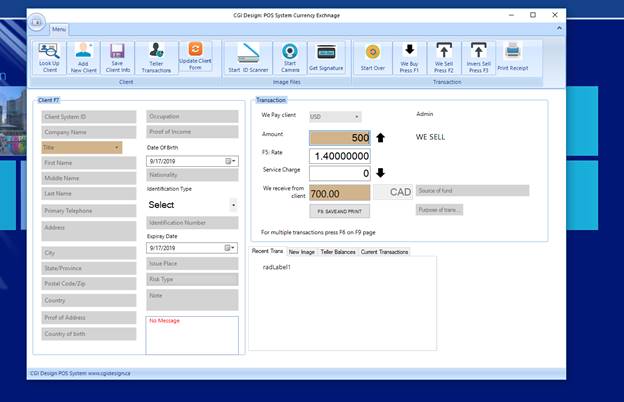
US F1, F2, F3 to commit transaction
We start with example: John Smith coming to your office to buy 100 EUR. He is a new client
We assume the base currency is CAD (your office is in Canada).
First we register client.
Press F7 and mouse curser with select Client system ID box. Fill the form and at least we need first, last name and phone number but add as many information you need.
Once you completed add client info we start the transaction. Client is buying 100 EUR it means We Sell
1- Press F2 (we sell).
2- Select currency from menu or type for auto complete
3- Enter amount 100
4- If you receive service charge enter service amount (Optional)
5- The total in Canadian CAD will be calculated and you can confirm with client
6- Press F9 to save and print the transaction
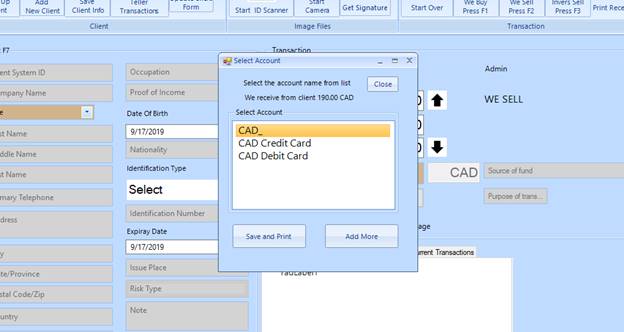
7- Next window is to select method of payment, cash, debit, credit, etc. ( you can customize method of payment, like add and remove method of payment, or have it completely customized, like “Bank Transfer”, “Third party payment” … )
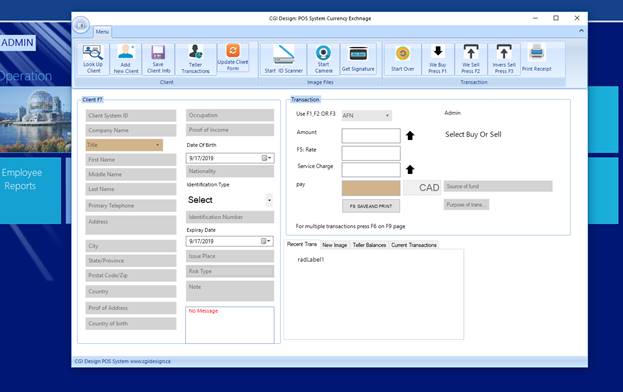
F3 and F2 they are both We Sell function but with F3 you first enter Base Currency amount. In example above instead client saying I’d like to buy 100 EUR he’d say I’d need 100 CAD converted to EUR
Then we use F3 and instead of first entering the amount for foreign currency we’d
enter amount for base currency (CAD for this example) and system calculate total in EUR client receives.
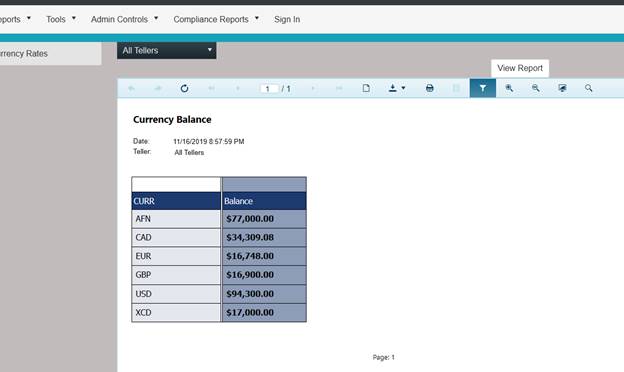
Cash In
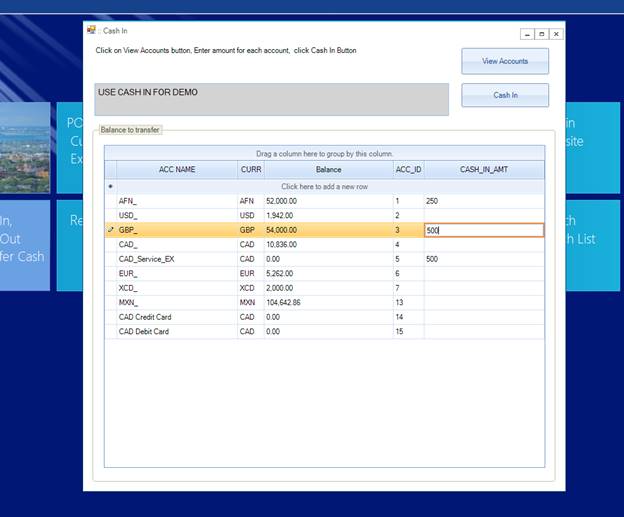
The cash in function is for when you want to adjust the balance for each currency
This window allow you view current balance for each currency and add more to it
1- From control panel click on cash in button
2- When the window opens click on View Accounts button
3- Enter amount you wish to cash in for each currency/account
4- Click on Cash IN button
5- Optionally you can add note for reminder
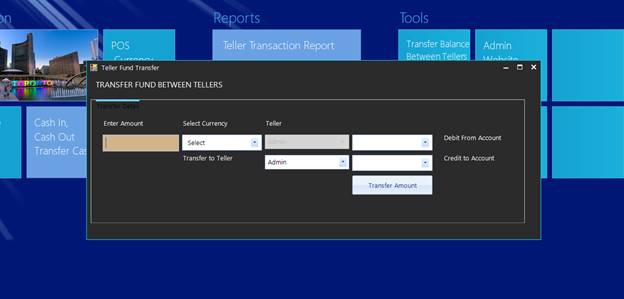
Teller Fund Transfer
This function is transfer fund from one teller to another
1- From control panel click on Teller Fund Transfer button
2- Small window will open , Enter amount to transfer
3- Select currency
4- Select the account that you are removing the money from
5- Select the teller that you transfer the money to
6- Select the account the available account money goes to
7- Click on Transfer Amount button
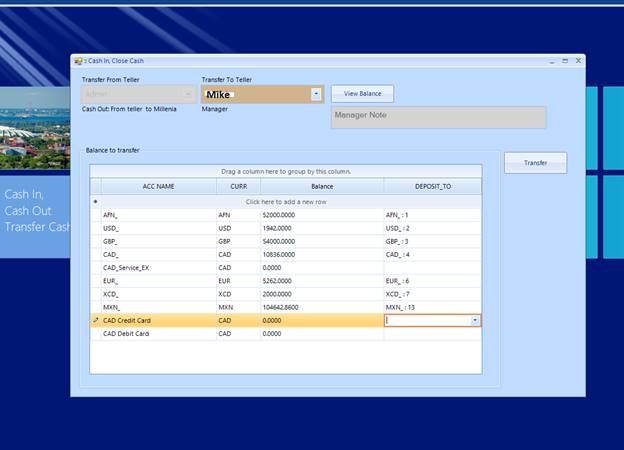
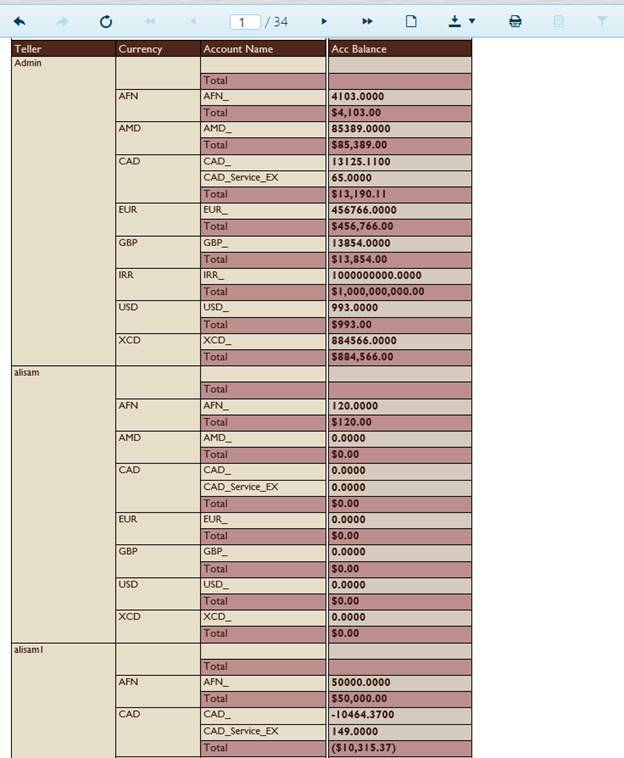
Close Cash or cash out
Once teller shift is over, Its time to cash out
The cash out function allow teller to close its cash and transfer all funds to another teller who is starting the shift. In this window manager always signs the cash out by adding his note in the note box
1- From control panel click on Close Cash button
2- Transfer from Teller always selected as logged teller
3- Select Transfer to teller from drop dropdown and click on View Balance button
4- At this point manager should confirm the balance matches the cash on hand
5- In Deposit to column select the account and by using tab and arrow down button move to next currency
6- Once accounts are selected for each currency click on Transfer button
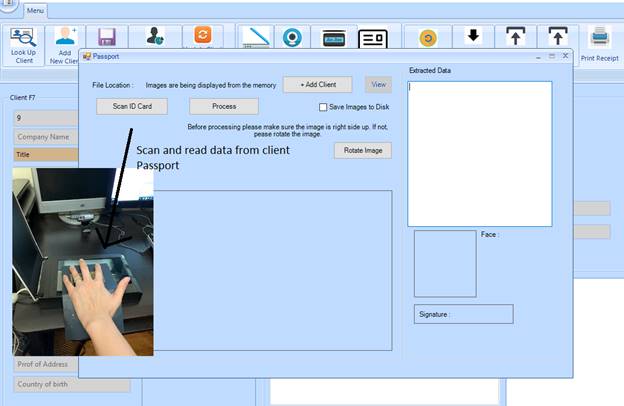
Integrate with Scanner
Attach scanner to the computer and start reading data from client passports. This is amazing feature for Airport location. Teller can conveniently scan client passport and office exchange will read passport
data and adds it to the form.

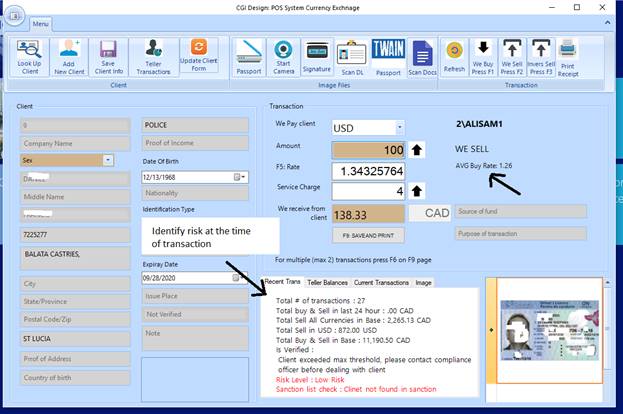
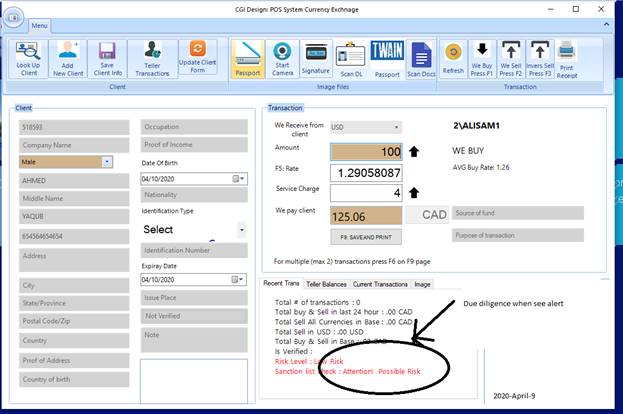
Due diligence
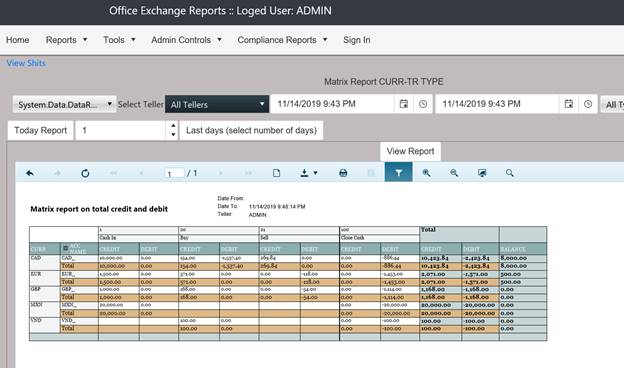

AML & Regulatory Reporting
Depending on the region, for some types of transactions you may have to report to appropriate regulatory. For example, MSBs in Canada mustreport suspicious and LCT (Large Cash Transactions) to FINTRAC.
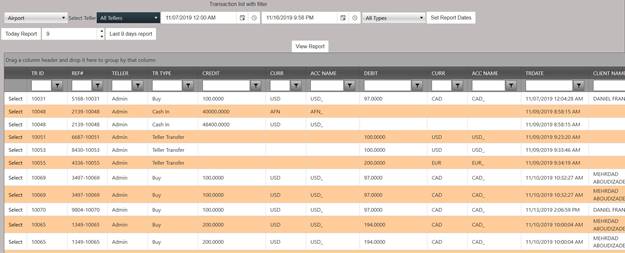
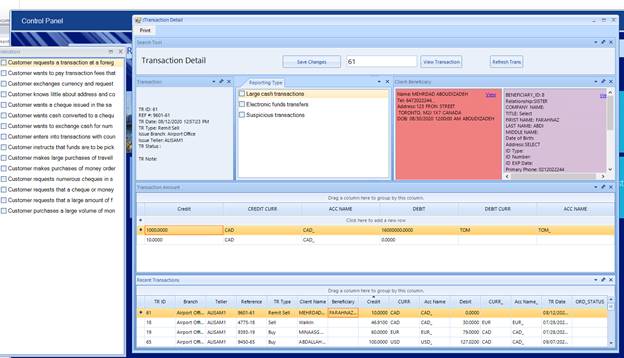
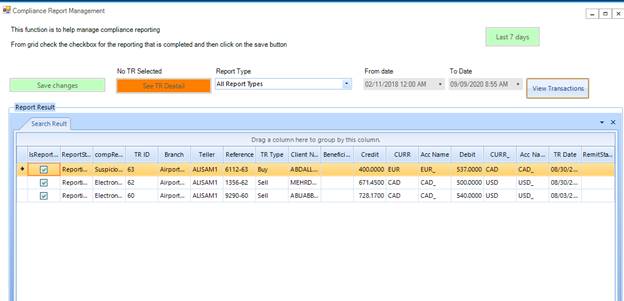
Office exchange lets you manage the regulatory reporting from transaction detail form
In transaction detail window, you can use reporting type checkbox to add the transaction to appropriate reporting type and use indicators to specify why it should be reported.
We customize the indicator and reporting type for every client,
Compliance report
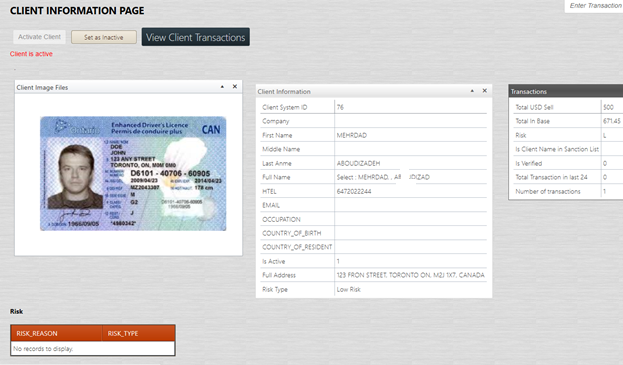
KYC
The KYC module allows compliance officer to do
n Risk rate client
n Block all activities or add to VIP
n Screen client against sanction
n Complete detail about client
n View totals (transaction amounts)